Smart Alarm System with Senvolon Presence Sensor KL MZ & Home Assistant
Build your own alarm system in an afternoon that can do more than many commercial solutions – and without monthly costs.
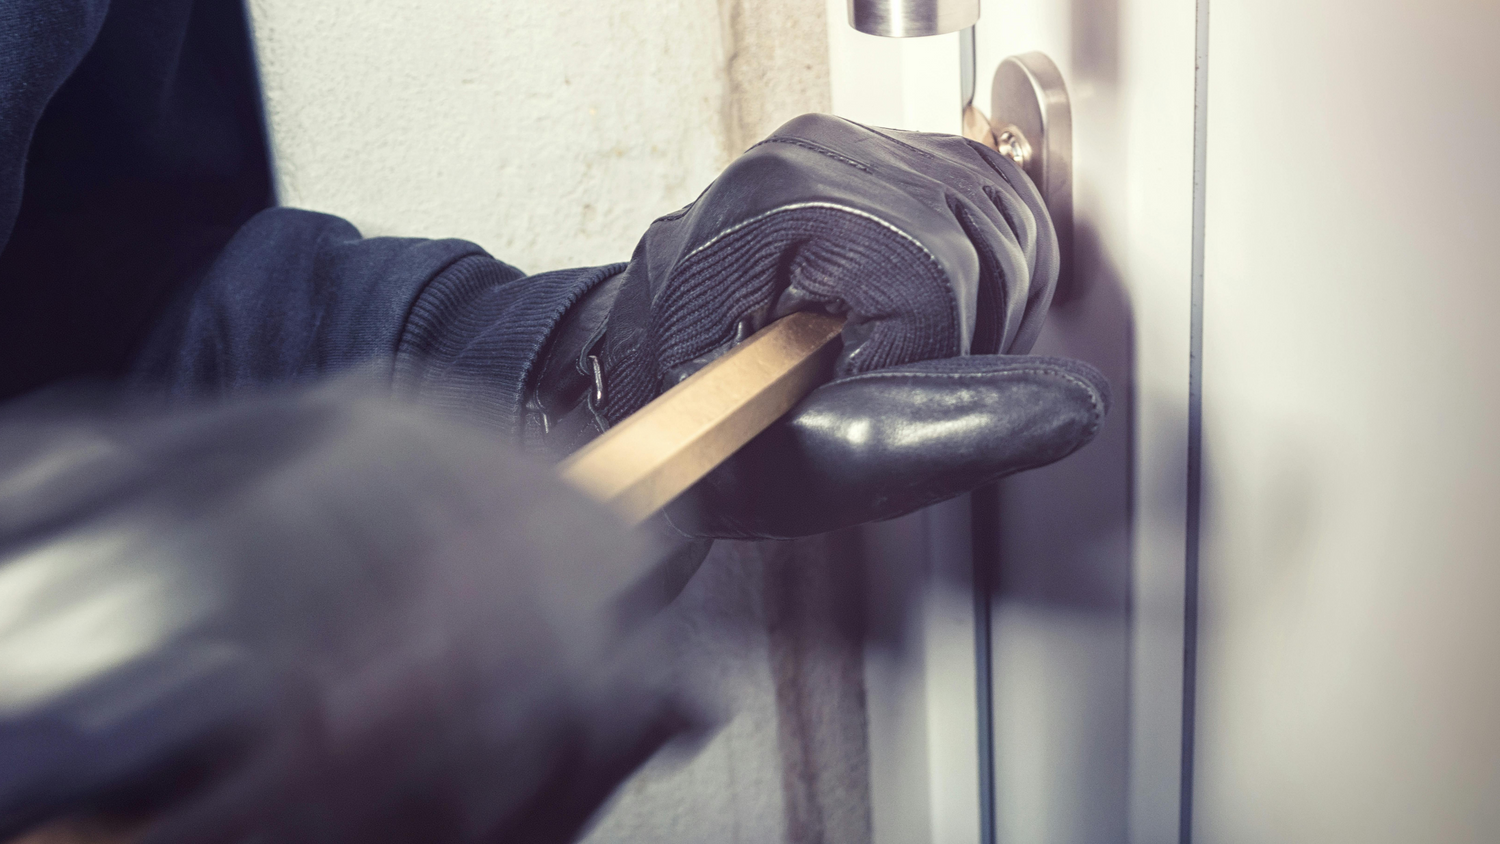
Why an Alarm System?
Honestly: have you ever thought about what happens when you're not at home? In Germany, around 77,000 burglaries are reported every year. That's over 200 per day. The good news is, over a third of attempted burglaries fail because security technology deters perpetrators or triggers an alarm early.
An alarm system not only gives you a better sense of security, but it also acts preventatively. Visible security technology is one of the most important deterrents. And some insurance companies even reward its use with lower premiums.
However, commercial alarm systems are often expensive, tied to cloud services, and require monthly fees. There's another way.
Why Radar Presence Detectors Are Ideal
Traditional motion detectors (PIR sensors) have two crucial weaknesses:
- They only detect movement. If someone stands still, listening or hiding, they are not detected.
- They don't know zones. The entire detection area is a single, undifferentiated area. Targeted monitoring of doors, windows, or room zones is not possible.
The Senvolon Presence Sensor KL MZ solves both problems at once:
- 60 GHz Radar also detects absolutely motionless people. Even breathing is enough as a signal.
- Up to 4 freely configurable detection zones per device: You define which area counts as "door", "window", or "room" and monitor these areas separately and specifically.
- Double benefit of a single sensor: When the alarm system is deactivated, the same zones can be used for other purposes. For example, to automatically switch lights on or off when you enter or leave the room.
- Integrated siren – this is a real difference from other sensors: No external device needed, in every room with a presence detector, you also have a siren directly. If an alarm is detected, all sirens become active.
- 100% local – no cloud dependency, no reliance on third-party providers
- MQTT integration – seamless and easy integration into Home Assistant
- Climate sensors included – temperature, humidity, air pressure, and brightness as a basis for further automations
In combination with Home Assistant, this becomes a full-fledged, smart alarm system. Flexible, expandable, and without ongoing costs.
Cost Comparison: Ready-made Solution vs. DIY
| System | Acquisition | Monthly Costs | Cloud Dependency |
|---|---|---|---|
| Comparable Ready-made Alarm System | €500–1,000 | €10–30/month | mostly |
| DIY with Senvolon + Home Assistant | €300–450 | €0 | No |
DIY Calculation Example:
- 3× Senvolon Presence sensors KL MZ: 3 × €99 = €297
- Home Assistant on existing Raspberry Pi or Mini-PC: €0–150
- Total: approx. €300–450, no ongoing costs
After 2 years with a cloud-based ready-made solution (at €15/month), you would have already spent €360 just on the subscription and would still be limited to PIR detection without zones.
What's Needed?
| Component | Details | Costs |
|---|---|---|
| 2–3× Senvolon Presence sensors KL MZ | Order in Shop | €99 each |
| Home Assistant | On Raspberry Pi 4/5, Mini-PC or NUC | €0–150 |
| WLAN Router | Probably already available | €0 |
| USB-C Power Supplies | 5V/2A per detector (USB-C cable included) | €0–10 |
| Smartphone | For notifications (HA Companion App) | available |
No separate central unit, no gateway, no additional siren needed.
Step-by-Step: Setting Up Your Alarm System
Step 1: Place and Mount Detectors
Consider which rooms you want to monitor. Typical setup for an apartment:
| Room | Position | Monitors |
|---|---|---|
| Hallway | Wall opposite the apartment door, 1.8 m height | Entrance area |
| Living Room | Wall facing balcony door, 1.8 m height | Balcony door & room center |
| Bedroom | Wall facing window, 1.8 m height | Window area |
Mounting Tips:
- Mounting height: 1.50 – 2.00 m (wall) or on the ceiling
- Clear line of sight to the monitoring area. No furniture in the way
- Avoid reflections – not directly opposite mirrors or large glass surfaces
- 120° detection angle – the detector covers a conical area in front of it
- For ceiling mounting: The higher the ceiling, the larger the detected area
Power is supplied via USB-C (cable included). Route the cable neatly along the wall or use the internal 5V connection for concealed wiring.
Step 2: Set Up MQTT in Home Assistant
MQTT is the communication protocol between your detectors and Home Assistant. You need an MQTT broker. The easiest way is the Mosquitto Add-on in HA.
Install Mosquitto:
- Go to Home Assistant to Settings → Add-ons → Add-on Store
- Search for "Mosquitto broker" and install it
- Start the add-on and enable "Start on boot"
Create MQTT user:
- Go to Settings → People → Users
- Create a new user, e.g.:
- Username:
mqtt_user - Password:
secure_password
- Username:
Add MQTT integration:
- Go to Settings → Devices & Services → Add Integration
- Search for "MQTT" and set up the integration
- Broker:
localhost(orcore-mosquitto), Port:1883
Step 3: Connect Detectors to WLAN and MQTT
Each presence detector has its own web interface for configuration.
- Initial setup: The detector creates its own WLAN on first startup. Connect to it and open the configuration page in your browser.
- Set up WLAN: Enter the data for your home WLAN (2.4 GHz).
- Configure MQTT under "Connections":
- Broker address: IP address of your Home Assistant (e.g.
192.168.1.100) - Port:
1883 - Username:
mqtt_user - Password:
secure_password - Topic: The name of the detector, e.g.
Hallway,LivingRoomorBedroom. This name is used as the basis for all MQTT messages from this device.
- Broker address: IP address of your Home Assistant (e.g.
- Set up zones: Under "Zones", define the detection areas and give them meaningful names without umlauts (Home Assistant adopts the name directly):
- Zone 1: Door or window area – e.g.
DoororBalconyfor early detection during a break-in - Zone 2: Room center – e.g.
Roomdetects movement in the entire room. This zone can also be used perfectly for lighting control when the alarm system is deactivated. Lights turn on automatically when someone enters the room. - Optional: Define interference zones to avoid false alarms from fans, swaying curtains, etc.
- Zone 1: Door or window area – e.g.
- Siren: The integrated siren can be controlled via MQTT at any time. This works independently of any further configuration. Home Assistant fully controls it via the automations in step 6.
Repeat the steps for each detector.
Step 4: Automatically Integrate Sensors into Home Assistant
The presence detector supports MQTT Auto-Discovery – once MQTT is set up, the detector automatically registers with Home Assistant. You don't need to write any YAML configuration.
At least the following entities are automatically created:
| Entity | Description | Type |
|---|---|---|
Presence |
Presence in room (yes/no) | binary_sensor |
Detection |
Number of detected people | sensor |
[Zone Name] |
Presence in the respective zone | binary_sensor |
Siren |
Siren on/off | switch |
Temperature |
Room temperature | sensor |
Humidity |
Humidity | sensor |
Air Pressure |
Air pressure | sensor |
Brightness |
Brightness | sensor |
The zones appear in Home Assistant with exactly the name you configured in the presence detector. If you give your zones descriptive names (without umlauts), you will have clear and easy-to-use entities directly in HA.
Tip: Name your devices in the presence detector after the room they are installed in (e.g.,
Hallway,LivingRoom,Bedroom). Then all entities in Home Assistant will be sorted directly by room. You can see the exact entity IDs at any time under Developer Tools → States.
Step 5: Set Up Alarm Control Panel
The Alarm Control Panel is the central control unit for your alarm system in Home Assistant.
Standard Installation (Home Assistant OS / Supervised)
Set it up via the user interface:
Settings → Devices & Services → Add Integration → "Manual Alarm Control Panel"
Configure the following:
- Name:
Alarm System - Arming delay:
30seconds – Time to leave the apartment - Trigger delay:
30seconds – Time to disarm after returning - Code: Your personal PIN
Docker Installation (e.g., via Portainer)
Note for Docker users: Unlike the standard installation, this integration cannot currently be set up via the user interface in the Docker/Portainer version. It must be manually entered into the
configuration.yaml.
1. Access the configuration file via SSH
Since Home Assistant runs in a Docker container, the configuration files are located in a protected system directory.
Open your terminal (PowerShell, CMD or macOS Terminal) and connect:
ssh admin@192.168.1.100Open the configuration file with administrator privileges in the Nano editor:
sudo nano /var/lib/docker/volumes/HASS_Config/_data/configuration.yaml2. Insert YAML configuration
Scroll to the bottom of the file and insert the following block. Make sure that alarm_control_panel: starts at the far left margin (no spaces before it!):
# Manual Alarm Control Panel
alarm_control_panel:
  - platform: manual
    name: Alarm System
    code: "0815"                # Your personal PIN
    delay_time: 30              # Time to disarm after returning (entry delay)
    arming_time: 30             # Time to leave the apartment (exit delay)
    trigger_time: 600           # Duration of alarm/siren (600 sec = 10 min)
Save & Exit: Ctrl + O → Enter → Ctrl + X
3. Check configuration and restart
- Open Home Assistant in your browser
- Navigate to Developer Tools → YAML Tab
- Click on Check Configuration
- If the green text "Configuration does not prevent startup..." appears, click Restart and confirm
4. Add control panel to dashboard
After restarting, the alarm system is registered in the system and still needs to be made visible on the interface:
- Go to your Overview (Dashboard)
- Click on the three dots in the top right → Edit Dashboard
- Click on Add Card and search for Alarm Panel
- Select the entity
alarm_control_panel.alarm_systemand click Save
Step 6: Create Alarm Automations
Now comes the core: the automations that turn your sensors into a real alarm system.
Where do I edit automations? The easiest way is directly in the HA interface under Settings → Automations → Create Automation. Alternatively, you can edit the
automations.yamlusing the File Editor Add-on (in the Add-on Store). After YAML changes: Settings → System → Restart (or reload configuration).
Automation 1: Trigger Alarm on Presence
- id: alarm_trigger_presence
  alias: "Alarm - Presence detected"
  description: "Triggers the alarm if presence is detected while the system is armed"
  trigger:
    - platform: state
      entity_id:
        - binary_sensor.flur_presence
        - binary_sensor.wohnzimmer_presence
        - binary_sensor.schlafzimmer_presence
      to: "on"
  condition:
    - condition: state
      entity_id: alarm_control_panel.alarm_system
      state: "armed_away"
  action:
    - action: alarm_control_panel.alarm_trigger
      target:
        entity_id: alarm_control_panel.alarm_system
Automation 2: Activate Sirens on Alarm```
- id: alarm_siren_on
  alias: "Alarm - Turn on sirens"
  description: "Activates all sirens when the alarm is triggered"
  trigger:
    - platform: state
      entity_id: alarm_control_panel.alarm_system
      to: "triggered"
  action:
    - action: switch.turn_on
      target:
        entity_id:
          - switch.flur_siren
          - switch.wohnzimmer_siren
          - switch.schlafzimmer_siren
Automation 3: Turn off sirens when disarmed or after 5 minutes
- id: alarm_siren_off
  alias: "Alarm - Turn off sirens"
  description: "Deactivates all sirens when disarming or after 5 minutes"
  trigger:
    - platform: state
      entity_id: alarm_control_panel.alarmanlage
      to: "disarmed"
    - platform: state
      entity_id: alarm_control_panel.alarmanlage
      to: "triggered"
      for:
        minutes: 5
  action:
    - action: switch.turn_off
      target:
        entity_id:
          - switch.flur_siren
          - switch.wohnzimmer_siren
          - switch.schlafzimmer_siren
Good to know: The sirens automatically turn off in two cases: If you disarm the system – or after 5 minutes at the latest.
Step 7: Set up notifications
Of course, even if you are not at home, you want to know immediately if something has happened.
Automation 4: Push notification on alarm
- id: alarm_notification
  alias: "Alarm - Push Notification"
  description: "Sends a notification when an alarm is triggered"
  trigger:
    - platform: state
      entity_id: alarm_control_panel.alarmanlage
      to: "triggered"
  action:
    - action: notify.mobile_app_dein_handy
      data:
        title: "🚨 ALARM!"
        message: >
          Presence detected! Alarm has been triggered.
          Time: {{ now().strftime('%H:%M:%S') }}
        data:
          priority: high
          ttl: 0
          channel: alarm
Tip: Install the Home Assistant Companion App on your smartphone. The notification service will automatically become available as
notify.mobile_app_your_phone– the exact name depends on the device name in the app.
Step 8: Create Dashboard
A clear dashboard gives you an overview of your alarm system's status at a glance. Here is a Lovelace configuration:
title: Alarm System
views:
  - title: Overview
    path: alarm
    icon: mdi:shield-home
    cards:
      # Alarm Panel
      - type: alarm-panel
        entity: alarm_control_panel.alarmanlage
        name: "Alarm System"
        states:
          - arm_away

      # Room Overview
      - type: horizontal-stack
        cards:
          - type: entities
            title: "🚪 Hallway"
            entities:
              - entity: binary_sensor.flur_presence
                name: "Presence"
              - entity: sensor.flur_detection
                name: "People"
              - entity: binary_sensor.flur_tuer
                name: "Door Zone"

          - type: entities
            title: "🛋️ Living Room"
            entities:
              - entity: binary_sensor.wohnzimmer_presence
                name: "Presence"
              - entity: sensor.wohnzimmer_detection
                name: "People"
              - entity: binary_sensor.wohnzimmer_balkon
                name: "Balcony Zone"

          - type: entities
            title: "🛏️ Bedroom"
            entities:
              - entity: binary_sensor.schlafzimmer_presence
                name: "Presence"
              - entity: sensor.schlafzimmer_detection
                name: "People"
              - entity: binary_sensor.schlafzimmer_fenster
                name: "Window Zone"

      # Sensor Data
      - type: horizontal-stack
        cards:
          - type: sensor
            entity: sensor.flur_temperature
            name: "Hallway"
            graph: line
          - type: sensor
            entity: sensor.wohnzimmer_temperature
            name: "Living Room"
            graph: line
          - type: sensor
            entity: sensor.schlafzimmer_temperature
            name: "Bedroom"
            graph: line

      # Latest Events
      - type: logbook
        entities:
          - alarm_control_panel.alarmanlage
          - binary_sensor.flur_presence
          - binary_sensor.wohnzimmer_presence
          - binary_sensor.schlafzimmer_presence
        hours_to_show: 24
        title: "Latest Events"
Tip: You can find the exact entity IDs of your zones (e.g.,
binary_sensor.flur_tuer) under Developer Tools → States in Home Assistant. Adjust the entity IDs in the dashboard accordingly.
Advanced Tips
Cleverly use zones
Each presence detector offers up to 4 detection zones. Use this specifically:
- Zone 1 directly aimed at a door or window → early detection as soon as someone enters
- Zone 2 aimed at the center of the room → detects any movement in the room
- Zones for lighting control: When the alarm system is deactivated, the same zones can be used for smart lighting automations – lights turn on as soon as someone enters the zone, and off when they leave.
- Define interference zones to suppress false alarms from known sources (fan, curtain)
Set up schedules
Automatically arm the system at night or when you leave the house:
- id: alarm_auto_arm_night
  alias: "Alarm - Auto-arm at night"
  trigger:
    - platform: time
      at: "23:00:00"
  action:
    - action: alarm_control_panel.alarm_arm_away
      target:
        entity_id: alarm_control_panel.alarmanlage
      data:
        code: "YOUR_CODE"  # Use the same code as during setup

- id: alarm_auto_disarm_morning
  alias: "Alarm - Auto-disarm in the morning"
  trigger:
    - platform: time
      at: "06:30:00"
  action:
    - action: alarm_control_panel.alarm_disarm
      target:
        entity_id: alarm_control_panel.alarmanlage
      data:
        code: "YOUR_CODE"  # Use the same code as during setup
Automatic arming when leaving the house
Even more convenient: The system automatically arms as soon as the last person leaves the house – without manual activation.
Home Assistant uses the zone function (zone.home) for this. As soon as the count of people in the home zone drops to 0, the automation is triggered.
- id: alarm_auto_arm_home_leave
  alias: "Alarm - Auto-arm when leaving home"
  description: "Automatically arm the alarm system when no one is home"
  trigger:
    - platform: state
      entity_id: zone.home
      to: "0"
  action:
    - action: alarm_control_panel.alarm_arm_away
      target:
        entity_id: alarm_control_panel.alarmanlage
      data:
        code: "YOUR_CODE"  # Use the same code as during setup
Prerequisite: The Home Assistant Companion App must be installed on all household members' smartphones and location sharing must be enabled. Only then can HA detect when no one is truly home.
Open window detection as a bonus
The integrated climate sensors provide an additional hint. A sudden drop in temperature in a room can indicate an open window.
Outlook: How to expand your system
Your alarm system is a solid foundation, and with Home Assistant, the possibilities are almost limitless:
- Camera integration: Add cameras and automatically capture a photo and send it to your phone when an alarm is triggered.
- Door and window sensors: Add Zigbee contact sensors for an additional layer of detection – for example, to react immediately when a door is opened, even before someone enters the detection area of the sensor.
- Lights as a deterrent: Automatically turn on all lights when an alarm is triggered. This further deters and simulates presence.
- Notify neighbors: Send a message to trusted persons in case of an alarm, e.g., via Telegram bot or Signal.
- More Senvolon presence detectors: Expand your system to as many rooms as you like. Each detector comes with radar detection, zones, and its own siren. All devices are centrally managed via Home Assistant.
Conclusion
With a few Senvolon KL MZ presence sensors and Home Assistant, you have an alarm system that goes beyond classic off-the-shelf solutions in several ways:
- Integrated siren in every sensor – no separate device, no additional effort. The alarm sounds everywhere it's detected.
- Freely configurable zones – you decide which areas are monitored and can keep an eye on doors, windows, and the center of the room separately.
- Dual use: The same zones that trigger the alarm when the system is armed can otherwise control lighting. One sensor, two tasks.
- Full flexibility: Thanks to Home Assistant, you can design automations, schedules, and notifications exactly to your needs and expand the system at any time.
- No recurring costs, no cloud dependency, full control over your data.
Ready to get started?
👉 Order Senvolon KL MZ Presence Sensor in the shop
If you have any questions, Senvolon support will be happy to help: support@senvolon.de